Hockey Player Has No Regrets After Making a Hard Call

Hockey Player Has No Regrets After Making a Hard Call

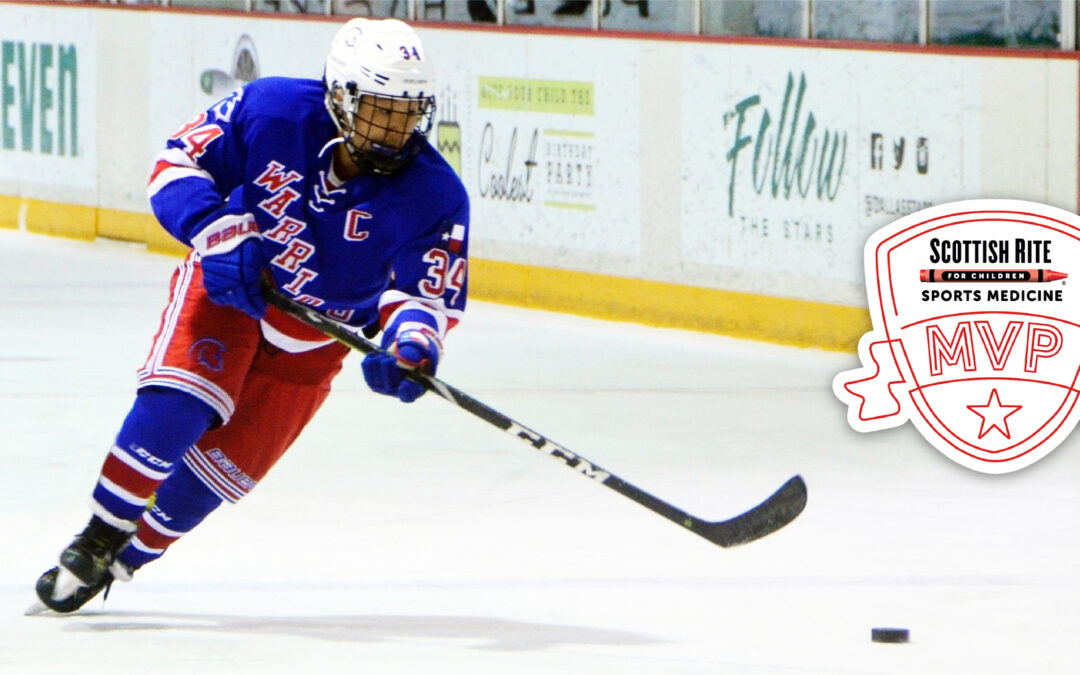
In June of 2020, 15-year-old hockey player Daniel was training after an outstanding season as captain of his team. It appeared that they had a great shot at going all the way in the upcoming season when everything suddenly went wrong. As he was going for the puck, Daniel’s knee collided with the knee of a player on the opposing team, and then he crashed into the boards. Daniel and his father, Andrew, knew that something was wrong, but they didn’t realize just how bad it was.

Daniel’s coaches had always recognized his speed since he started playing at ten years old. “They say that Danny’s speed is one of his best assets,” says Andrew. “They say that you can teach skills, but you can’t teach speed, which is a great benefit for him.” Daniel remained positive and motivated as he discovered the extent of the injury and his treatment options.

At the Scottish Rite for Children Orthopedic and Sports Medicine Center in Frisco, an X-ray and MRI showed that Daniel had an osteochondral fracture of the patella (kneecap) and a loose body in the joint, likely a piece of bone or cartilage. When Daniel was hit on the outside of his knee, his kneecap likely slipped out to the side and scraped the thigh bone, causing the bone and cartilage injury. This injury is often called a patellar subluxation or, more generally, patellar instability. Scottish Rite for Children offers care of complex cartilage conditions, including osteochondral fractures like Daniel’s.

Pediatric orthopedic surgeon Henry B. Ellis, M.D., offered Daniel two approaches for treatment. One option was to focus on the osteochondral injury on the patella. This option would likely get him back on the ice faster, which was an important consideration for Daniel. When the patella slipped, a vital ligament stretched and tore. Without fixing it, the knee would be vulnerable, and another similar injury would have put Daniel at risk for knee issues as he got older. The second option Ellis suggested was to combine the first option with the reconstruction of the medial patellofemoral ligament (MPFL), even though it would take him out of the game for at least six months. To add to the complexity, Ellis recognized that Daniel had a discoid meniscus, meaning the cartilage in his knee was misshapen. Though relatively uncommon and often without symptoms, this pediatric condition is very familiar to Ellis, so he recommended reshaping it during the surgery as well. Together, these procedures would leave Daniel with much better stability and a much better outlook for the future. Even though Daniel wanted to get back on the ice as soon as possible with his team, he and Andrew decided to go with the comprehensive plan. “Dr. Ellis explained everything to us very clearly, so it made the decision much easier, even though it wasn’t what Danny wanted at first,” says Andrew.

An MPFL reconstruction requires time for tissue healing and an intensive rehabilitation program to return to activity and progress to sports safely. “It was pretty hard at first, but my therapist told me that I was doing pretty well and that I was progressing pretty fast, so that kept me encouraged,” says Daniel.

When Daniel first returned to the ice about four months after surgery, he was feeling less confident than he did before his injury. His teammates and his coach encouraged and supported him, which helped ease his concerns about using his full speed again. When Daniel scored his first goal after his full release back to hockey, everyone cheered wildly. Daniel says that he is doing great now and that he has total confidence in his knee. Daniel and his team, the Texas Warriors, worked hard all year, and in March of 2021, their hard work paid off when they won the state championship, and he has the ring to prove it. Daniel and his team also played in the 2021 USA Hockey National Tournament as state champions of Texas.

Many patients, including Daniel, acknowledge Ellis’ ability to explain the options and include them and their families in the decision-making process. Daniel is also thankful that he did not settle for the quickest option. “Not always taking the fastest option can be a good life lesson,” says Daniel. “Don’t get discouraged and keep working hard to get back where you were.” Some athletes tell us they end up better than they were, and it looks like Daniel is on that path, too!

“Daniel had to make a tough decision and was mature enough to think about the long term more than the short term,” says Ellis. “Turns out he made the correct decision as both short-term and long-term goals were met. Congrats, Daniel, on a well-deserved ring and championship!”

We enjoy hearing about our current and former patients’ success stories. Tell us about your MVP

Evaluating Adolescent Ankle Pain

Evaluating Adolescent Ankle Pain

Content included below was presented at the 2021 Pediatric Orthopedic Education Symposium by sports medicine physician Jacob C. Jones, M.D, RMSK.

You can watch the full lecture and download this summary.

The ankle is one of the most commonly injured body parts in children of all ages. An ankle sprain usually occurs when the ligaments, which support the three ankle bones, are stretched beyond their normal limits. This often occurs when the ankle is twisted or rolled inwards. When this happens, the ligaments can stretch or even tear. An evaluation by a pediatric orthopedic specialist can help to prevent potential complications. Usually X-rays are required to make a diagnosis and treatment will depend on multiple factors, including the specific type of injury and age of the patient.

Ankle Anatomy

Lateral Ankle
There are three major ligaments in the lateral ankle:

  • Anterior talofibular ligament (ATFL)
  • Calcaneofibular ligament (CFL)
  • Posterior talofibular ligament (PTFL)

Medial Ankle
The ligaments on the medial aspect are grouped together into a ligament complex called the deltoid ligament.

Posterior Ankle
The main area of concern here is the Achilles tendon which connects the calf muscles down to the calcaneus, or heel bone.

Anterior Ankle
There are two major areas to focus on in the anterior ankle:

  • The high ankle
    • Several ligaments in the upper part of the ankle are grouped together.
    • Ankle syndesmosis
      • These are the ligaments that connect the tibia to the fibula.
  • The low ankle
    • This is where the tibia and fibula interact with the main ankle bone (talus).
      • Tendons and other tissues coarse over the anterior portion of this joint

History
Knowing the patient’s history is vital for diagnosing the problem. There are two key things that physicians should ask when covering the patient’s history:

  1. Was there an injury?
  2. If there was an injury, can the patient recreate the injury?

Sometimes adolescents or younger populations have trouble verbalizing what happened to them, but they can demonstrate it with their injured ankle, their uninjured ankle or with their hands. This can help physicians determine what to focus on during the physical exam and help guide the diagnosis, evaluation and treatment.

Inspection

  1. Look at all aspects of the ankle to make sure that there are no breaks in the skin, bruising, swelling, erythema or deformity.
  2. Have the patient stand if they are able to do so. This gives a view of their overall alignment.
    • Look at the knees to see which way they are facing.
    • Assess for curvatures in their lower extremities, which may play a role in their pain or may have been a contributing factor to their actual injury.
  3. Have the patient turn around to look at them from the posterior aspect.
    • Look at their alignment from this view, paying particular attention to the lower aspect to see what their alignment looks like down low.
    • Check for any kind of curvature or angulation of their heel that may also contribute to their pain and injury.
    • Look at their arches to see if they are flat (pes planus) or if they have a high arch (cavovarus foot) that may be contributing to the pain that they are having or may have contributed to their injury.

Active Range of Motion
Testing a patient’s active range of motion shows how far they can move their joint on their own. Have the patient move their foot in circles one way and then the other. Then have them move in each particular plane, by dorsiflexing up, plantar flexing down, internally rotate or invert then have them externally rotate and move their toes as well.

Neurovascular Check
Visually inspect and check the dorsal aspect of the midfoot and palpate for the dorsalis pedis pulse. The posterior tibialis pulse is located just posterior to the medial malleolus. Assess sensation on the distal aspect of the foot.

Palpation
Palpating helps to define the painful area and often guides next steps, such as X-rays. Pain may be apparent during the evaluation, however, asking questions throughout is recommended. To avoid missing any structures, this assessment should be consistent for any ankle injury. Start at the very top, just below the knee, and methodically work down.

  1. Palpate between the tibia and the fibula to see if there are potential injuries in that area.
  2. Palpate over the anterior aspect of the ankle
  3. Palpate over the medial malleolus and the deltoid ligament.
  4. Palpate the lateral malleolus, and then around it. Assess all three lateral ligaments: ATFL, CFL and PTFL
  5. Palpate all over the foot to make sure there isn’t any pain there.
  6. Palpate the posterior aspect. Squeeze on and around the Achilles tendon and move down to the calcaneus.

Special Tests
These special maneuvers help physicians in their evaluation of the patient’s ankle.

Anterior Drawer Test (ATFL Laxity)
This test attempts to separate the lower aspect of the ankle from the upper aspect of the ankle by moving the ankle anteriorly. The ATFL is being stressed with this test.

  1. Get a good firm grip on the lower leg with your non-dominant hand. You will be providing counter-traction with that hand and you don’t want it to move.
  2. With your dominant hand, cup the heel with a firm grip and try to move that ankle anteriorly without the foot flexing too much. While doing this, feel how much the ankle moves and look for an endpoint when the ATFL ligament becomes taught.
    • With an alternative method, you wrap the thumb of your dominant hand over the anterior aspect of the ankle. This can give more of a firm grip and more control while moving the ankle anteriorly.
  3. Always check the contralateral side to see what the patient’s baseline is. This comparison can tell you if the ligament is injured, and/or not functioning the way it should be.

Talar Tilt/Stress Inversion Test
This test stresses these lateral ankle ligaments. You can tilt the foot the other way to stress the medial ankle ligament.

  1. Get a firm grip of the lower leg to make sure that doesn’t move.
  2. With your other hand, get a full grip on the whole foot, not just the toes.
  3. Slowly tilt it in a clockwise motion on the left ankle.

Thompson Test (Achilles Tendon Injury)
This test is to evaluate for an Achilles tendon injury. When the calf muscles contract, it causes the Achilles tendon to pull that calcaneus upward which in turn, causes the foot to go plantar flex, or move downward a little bit. If there is no movement, you have a positive test. This could be because of a tear of the Achilles tendon.

  1. Have the patient lay prone on the exam table with both feet are dangling off the edge. Make sure the patient is relaxed and comfortable.
  2. Squeeze the calf muscle. As you squeeze the calf muscle, look to see if the foot plantar flexes.
  3. If it does plantar flex, it tells you the Achilles tendon which connects the calf muscle and the foot is intact.
  4. Always compare with the other leg.

Squeeze Test (High Ankle Injury)
The squeeze test evaluates for a high ankle injury and can be performed during the palpation assessment. When you squeeze the upper parts of the leg, the lower part of the leg to tries to spread apart. If there is an injury in this area, there will be more movement, or more commonly, more pain. Patients will point to this area to show where they are having pain.

  1. Squeeze at the upper aspect of the tibia and fibula. You are trying to squeeze those two bones together. Work your way down and squeeze in different areas.
  2. What you are looking for when you squeeze is if there is more movement in the distal aspect of the tibia and fibula, or more commonly, if they have pain in that area.

External Rotation Testing
This test is also for high ankle injuries. With external rotation, the talus is going to try to move apart the tibia and the fibula. And so if there is an injury to the high ankle, it is going to cause that part or that high ankle area to have some pain or to try to move apart.

  1. Make sure that you have a good grip on that lower extremity to keep it stable.
  2. With the palm of your other hand, externally rotate that patient’s foot while making sure the patient is relaxed. You are looking for pain and for a little bit more movement.

Resistive Range of Motion
Resistive range of motion testing assesses the patient’s strength.

  1. As the patient inverts, everts or externally rotates, plantar flexes and dorsiflexes, push against them to provide resistance and to test how strong they are.
  2. Compare to their other leg.

Gait Evaluation
Observe the patient walk down a hallway, not just in an exam room. Look for any type of limp or asymmetry. Make note of the patient’s alignment and their cadence. A conversation or other distraction can help them walk more naturally.

Double and Single Leg Toe Raise
A functional test like the double or single leg toe raise assesses the strength of the patient’s lower extremity and how their pain is in regards to their movement in a weight bearing position.

  1. Have the patient go up on their toes, starting with both feet at once to see if they are able to do this or not. This shows how strong they are and how confident they are on their ankles.
  2. Have the patient do several single-leg toe raises on each leg
    • If the patient can do this, it shows that their ankle is pretty strong and they can likely start getting ready to return to sport.
    • If the patient cannot do this, they are still too injured to return to sport.

Ankle X-rays
It is most common to order three views of the ankle after an ankle injury. Foot X-rays may be needed if the exam findings include midfoot or distal complaints. Standard three views of the ankle includes:

  1. Anterior/Posterior (or AP) – gives a good view of the anterior aspect of the joint.
  2. Mortise – this one is slightly angled from the AP which allows you to see the lateral malleolus at a different angle and lets you see the joint between the talus and the tibia and fibula well. You can also see the area of the high ankle without any bony overlap.
  3. Lateral – with this view you can see the posterior aspect of the ankle and the calcaneus very well.

Conclusion
The ankle is a complex and highly mobile joint. Due to the demands of sports and activities, the ankle is a risk of injury and should be fully evaluated for bony and soft tissue injuries. Watch the 20-minute lecture which includes video demonstration of the ankle exam on a pediatric patient.
Building Muscle in Young Athletes: Making Nutrition Count

Building Muscle in Young Athletes: Making Nutrition Count

Young athletes in strength-based and power sports may desire to increase muscle mass for better performance or to help them as they start a new position on their team. “While there are many nutrition supplements available, it’s important to understand that these may not be safe for children and teens,” says Taylor Morrison, MS, RD, CSSD, LD. “A young athlete at the appropriate developmental stage should be able to achieve his or her goals with with food and beverages alone.”


Before setting any goals, it is also important to understand that young pre-pubertal athletes will not gain muscle mass like an adult because they do not yet have the level of hormones needed to support these gains. While he/she can still build muscle, the level of hormones required to support larger gains in muscle, like those often desired by young male athletes, are not present until after puberty.

When ready, here are important facts to know about how the young athlete’s nutrition can help build muscle for sport.

What builds muscle?

With the appropriate hormones present, these are necessary components for building muscle:

  1. Adequate calories: Getting enough calories or increasing daily calorie intake is essential to building muscle.
  2. Protein: Protein is the key nutrient for building muscle and should be included in all meals and some snacks.
  3. Carbohydrates: Carbohydrates are the main source of energy for working muscles and the brain. They should be present in all meals and snacks to provide energy and allow protein to build desired muscle mass.
  4. Resistance training: Exercises like lifting, pushing and pulling an outside force create necessary changes within the muscle that result in longer, stronger and bigger muscles.

Easy ways to increase calories

  • Increase the number of meals or snacks eaten per day. Most young athletes need a minimum of 3 meals and 2 snacks per day.
  • Add spreads to sandwiches and wraps such as avocado, hummus, pesto and mayonnaise.
  • Choose heartier or thicker slices of bread.
  • Include oatmeal or fresh smoothies with breakfast or snacks and add items such as milk, yogurt, peanut butter, almond butter, honey, fruit, flax or chia seeds.
  • Choose nutrient-dense cereals such as: granola, Raisin Bran®, shredded wheats and Grape-Nuts®.

Ideas for increasing protein at meals and snacks

  • Add an egg or Greek yogurt to breakfast.
  • Choose granola bars with whole grains, nuts or seeds.
  • Include a string cheese with a snack.
  • Add a glass of milk or chocolate milk to meals or snacks.
  • Include beans, nuts and seeds in salads.

Carbs to include with meals & snacks

  • Whole-grain bagels or English muffins.
  • Fresh or dried fruits.
  • Starchy vegetables like white potatoes, sweet potatoes, peas, corn, winter squash.
  • Rice, pasta, quinoa, couscous, etc.
  • Milk or yogurt (also great sources of protein and calcium).
  • Whole-grain crackers, cereals, granola bars.

Keys to Success:

  • Be realistic: Young, pre-pubertal athletes will not gain muscle mass like an adult.
  • Work on body composition changes during the off-season. Trying to make big changes during the season could lead to decreased performance or injury.
  • Plan for gradual muscle gain. Include a well-balanced diet and a developmentally appropriate strengthening program.
  • Remember, the overall goal is optimal performance. Measure improvements in performance (jumping height, running distance, etc.), not a number on the scale.
  • Focus on real food: Rely on healthy, high-calorie and nutrient-rich foods instead of supplements and protein powders.
  • Get enough sleep and manage stress. This is often forgotten for achieving body composition or weight goals, but it is very important.

If unsure where to start, it’s always a good idea to work with a certified sports dietitian who can help you create a plan, recommend products and support you as you work towards your goals.

Not sure if your athlete is ready to build muscle? Read “Building Muscle in Young Athletes: Getting Started

Visit our sports nutrition page to learn more about nutrition and fueling the young athlete.

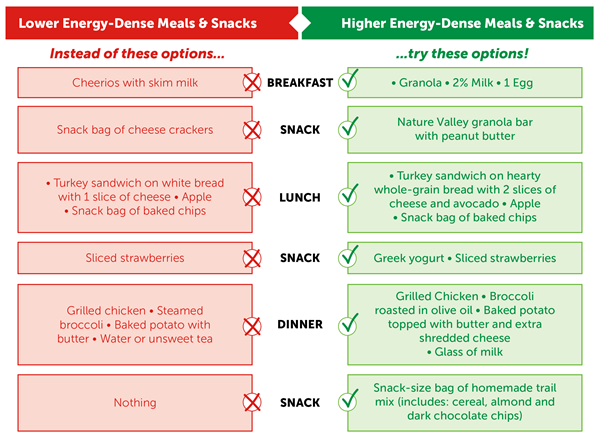
What Does a Day of Muscle Building Meals & Snacks Look Like?
Specific foods and portion sizes will vary based on an athlete’s size, age, sport and training demands.

Here is a great example. 

Recovery Strategies for Young Gymnasts

Recovery Strategies for Young Gymnasts

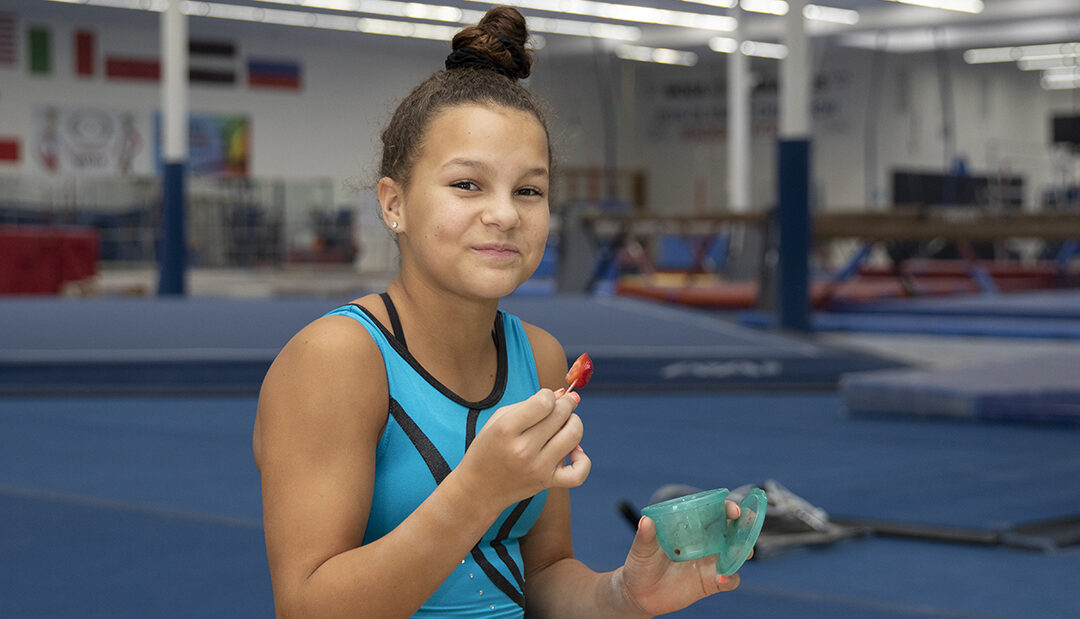
Gymnasts have training needs that differ from many other athletes.

The demands on gymnasts typically involve many hours of high-intensity skills training. Not addressing recovery with the same commitment can leave them less prepared for another workout and at an increased risk for injury. Gymnasts and other athletes have to balance training sufficiently with appropriate rest and recovery techniques. Investing valuable time and money into recovery strategies requires thoughtful consideration.

Recovery principles include reducing edema (swelling), improving blood flow, restoring damaged muscle cells, reducing soreness and returning the athlete to a state for optimal training. These are achieved using a combination of these modalities:

  • Compression
  • Massage
  • Cold

Common strategies include:

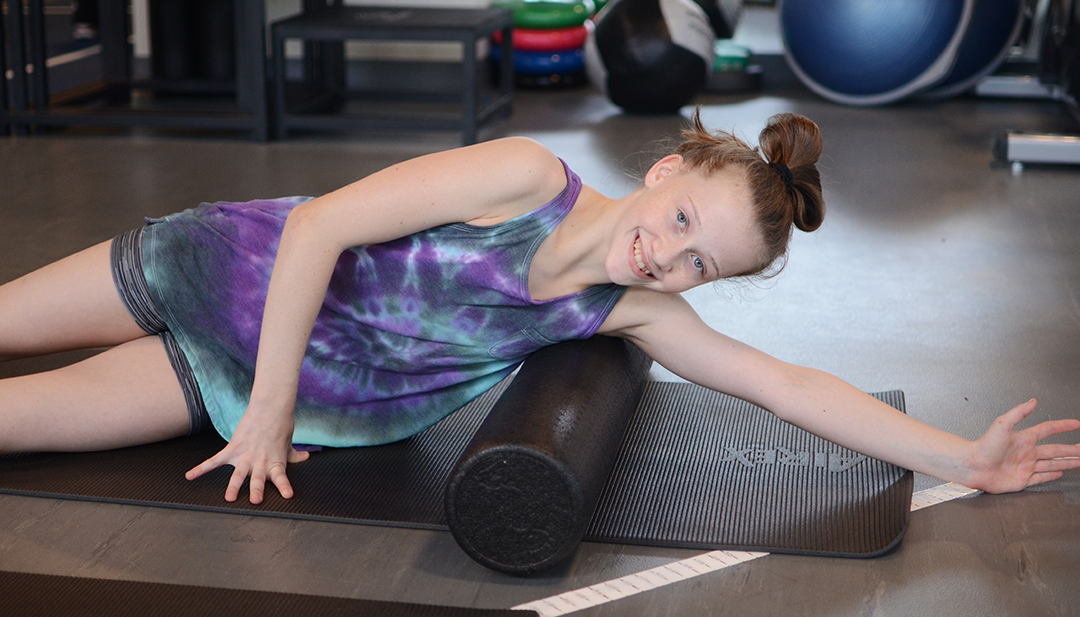
  • Massage sessions or tools – Generalized massage can be beneficial to circulate the blood and prevent stiffness post-workout. Localized massage, foam rollers or manual therapy can address specific areas of pain or release tense muscles to reduce postural malalignment.
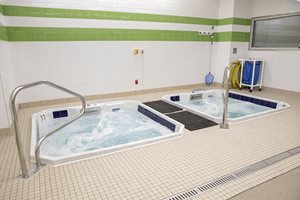
  • Contrast hot/cold pools – Water offers a dual approach to recovery. The immersion provides compression and alternating between warm and cold environments adds the benefits offered by cold therapy. At Scottish Rite, we have HydroWorx® hot and cold plunge pools for our patients.

  • Epsom salt baths – Easy to implement at home, adding Epsom salt (a naturally occurring mineral compound) to a bath offers a combination of the benefits of compression from immersion as well as possible benefits from the absorption of magnesium, which may help to reduce muscle soreness.
  • Combination cold and compression – After an injury or training, RICE (Rest Ice Compress Elevate) is a traditional approach to reduce swelling. Our team uses a GameReady® device which provides both cold and compression.  The device circulates very cold water around the joint or limb while simultaneously mimicking the muscle pumping actions that circulate blood and prevent swelling.
  • Dynamic compression device – Improving on a therapeutic concept of sequential compression to improve blood flow in the legs, companies like Normatec offer a sleeve that applies a wave of pressure to mimic muscle action.
  • Active recovery – Lower intensity exercise after higher intensity exercise may help reduce stiffness, optimize gains made during training and use muscle activation to create the compressive forces to improve blood flow. Examples include:
    • Dynamic (active) or static stretching
    • Swimming
    • Yoga
    • Pilates
    • Cycling

  • Nutrition – Properly timed and pre- and post-workout fueling help optimize the athlete’s recovery:
    • Anti-inflammatory foods that have shown promise in treating muscle soreness: watermelon, cherry juice, pineapple and ginger.
    • Recovery snacks need these three key components:
      • Carbohydrates
      • Protein
      • Fluid

Professional athletes, world-class gymnasts and exercise enthusiasts have appreciated the value of recovery. Young athletes should learn recovery principles and learn to “listen” to how their bodies respond to exercise and modalities to optimize recovery and prepare for the next workout.

Learn more about pediatric sports medicine. 

Building Muscle in Young Athletes: Getting Started

Building Muscle in Young Athletes: Getting Started

Young athletes may express an interest in building muscle or “lean body mass” for a variety of reasons. Body composition includes water, bone, fat, muscle and other tissues such as organs and vessels. The elements that are most affected by diet and exercise are fat and muscle. Pediatric sports medicine physician Jacob C. Jones, M.D., RMSK, says, “there are many benefits to increasing lean body mass, and for athletes, the growth of muscles often translates to improved strength and performance.”

Why might a child or teen want to increase lean body mass?

Motivation can come from inside the individual (intrinsic) or from an outside (extrinsic) demand or expectation. Intrinsic motivation is often called “drive” and can be a healthy approach to making positive changes in one’s life. These may include a desire to compete at a higher level, to be stronger, or to improve other areas of performance. Extrinsic motivation often comes from a parent, coach or peer that causes an athlete to set a bar or goal according to their expectations. These may include positive or negative pressures to meet a goal based on their own performance or in comparison to a standard or a teammate.

How can a parent know when a motivation or behavior is concerning?

When the motivation does not align with positive health goals or is based on an irrational comparison or expectation, there is a concern for the athlete’s safety. When an athlete has set a lean body mass target that is unhealthy, a parent may notice behaviors such as restrictive eating or over-exercising. Learning healthy strategies and setting appropriate goals can help to avoid these approaches. Consulting the pediatrician or primary care doctor can help reset goals and assess the need for additional help.

How can a young athlete increase lean body mass?

The strength of a muscle is defined by the amount of force it can resist. Muscle strength is measured when pushing, lifting or pulling an object or the athlete’s own body. More resistance must be applied progressively to increase the size (hypertrophy), length and strength of the muscle with exercise. With consideration of safety and proper fueling and recovery, resistance training leads to an increase in body mass.

What is a good first step in building lean body mass?

For some, resistance training has a narrow definition and requires lifting weights. Yes, lifting weights with proper technique can improve strength. However, equipment is not necessary to improve strength for most children. Activities that use gravity and body weight are an excellent starting point. These include doing ‘crab walks,’ ‘bear crawls,’ and ‘kangaroo hops.’ These activities properly focus on coordination, developing core strength and learning proper form before adding weight.

How can a parent help guide safe choices with resistance training?

  • Discourage comparison with like (or unlike) individuals. Keep the athlete focused on his or her goals and healthy strategies.
  • Provide access to a trained coach. Look for someone with a background and experience in nutrition and resistance training for children.
  • Promote training changes throughout the year. Strength and conditioning programs should vary based on sport season demand (pre- and post-season),
  • Facilitate rest in- and out-of-season. Year-round training, overuse and overtraining have been shown to increase the risk of injury. Regular rest is important.
  • Learn how nutrition plays a role in building muscle mass. Fueling for training and recovery can make exercise more effective.

What are safe measures of success for resistance training?

Using the scale or the amount of weight on a bar as the only measures of success can lead to poor and unsafe choices. Goals like these must be balanced with others that are more likely to directly translate to success on the field. These might include performance measures like endurance, jump height or other sport-specific skills.

Tips for setting appropriate goals –

  • ​Choose goals that are challenging but still achievable.
  • Consider the demands of the sport and position as well as the current weight and body type of the athlete.
  • Ask for help from the:
    • team coach to suggest goals based on the athlete’s performance, sport and season.
    • strength and conditioning coach to set progressive resistance and repetition goals based on the athlete and his or her capabilities.
    • primary care doctor or pediatrician to establish appropriate body composition goals and to discuss nutritional needs based on family and patient history.

How can a parent support a young athlete to safely increase lean body mass?

  • Encourage open conversations about goals and progress.
  • Ask what is driving the desire for change.
  • Confirm appropriate instruction and supervision is in place.
  • Discuss plans and progress with a sports dietitian, a strength and conditioning coach and a primary care doctor.
  • Monitor for signs of overtraining or worrisome behaviors that increase the risk of injury.
Nutrition Tips for Young Athletes in Stop-and-Go Sports

Nutrition Tips for Young Athletes in Stop-and-Go Sports

A stop-and-go sport, also known as a high-intensity interval exercise, includes baseball, softball, football, volleyball, basketball, ice hockey, soccer and tennis. These sports require coordination, agility and concentration. Quick reactions in these sports demand bursts of energy, speed and power.

Alternating periods of intense power and speed, with short or long periods of rest, involve all of the major energy systems in the body. Therefore, meals and snacks throughout the day for these athletes should include appropriate mix of all foods and nutrients.

“It’s easy for busy young athletes to not make food a priority, showing up for practices and games under fueled and thinking they can power through”, says certified sports dietitian Taylor Morrison, M.S., R.D., CSSD, L.D. “However, the reality is that food and nutrition are very important components to optimal performance and injury prevention. The good news is that this food and nutrition doesn’t have to be complicated. An athlete can incorporate simple meals, snacks and fluids throughout the day using some general guidelines thereby reducing concerns and optimizing health and performance”.

CONCERNS FOR THE YOUNG ATHLETE IN STOP-AND-GO SPORTS
Burning Out Early 
Because of the intensity of some stop-and-go sports (like basketball, soccer, tennis and hockey) and because of the length of some games (like baseball or football) and tournaments (like basketball, soccer, tennis and volleyball), young athletes can use up their energy stores before the event is over. This especially becomes a problem if the athlete has not eaten a proper meal or snack earlier in the day or prior to the event and does not bring appropriate snacks for during the event.

End of the Season Injury
If this pattern of burnout continues, the constant fatigue during events can put the athlete at increased risk of injury due to decreased motor skills and performance. Poor nutrition or under-fueling can also lead to a lack of important nutrients like protein, fat, iron, calcium and vitamin D, which can also increase an athlete’s risk of injuries like stress fractures.

Dehydration
Dehydration is another contributor to fatigue, but also a cause of headaches and muscle cramps in the young athlete. Either of these can lead to decreased performance and injury. Of special concern are those young athletes playing in the heat or with extra gear like football, softball and hockey. Dehydration in these young athletes can lead to heat illness if it is not properly recognized and addressed.

NUTRITION SOLUTIONS FOR THE YOUNG ATHLETE IN STOP-AND-GO SPORTS
Proper Fueling Before and During Events
Eat a balanced meal at least three to four hours prior to the event and a small snack just before. Make sure to offer easy-to-digest carbohydrates to keep energy levels up until the very end of games and tournaments. More popular suggestions are fruit slices, dried fruit, crackers, pretzels, fig bars or sports drinks.

Balanced Meals Throughout the Day
Remember that the exact amount of food and nutrients needed vary depending on gender, height, weight, stage of development, sweat rate, sport played and position played. However, overall a young athlete’s plate should consist of:

  • Variety of Carbohydrates – Mix it up with sources like milk and yogurt, whole grains, fruits and starchy vegetables. Carbohydrates provide short and long-term energy to fuel for a practice, game or tournament.
  • Lean protein – Protein is important to repair any torn muscles and build tissue.
  • Healthy fats – Fat is important for the growing brain and has potential anti-inflammatory benefits.
    • Healthy fats, such as mono- and polyunsaturated fats, are important for brain development and function, aid in the absorption of vitamins A, D, E, and K and may have anti-inflammatory benefits. Learn more about healthy fats for the young athlete.

Getting carbohydrates, protein and fat from a variety of sources ensures that the athlete is also getting proper amounts of other nutrients like calcium, vitamin D and iron, among many others. Eating enough calories from carbohydrates, protein, fats and these nutrients helps promote optimal recovery and prevents injuries.

Hydrate
Drink fluid consistently throughout the day. Most of the time, an athlete should choose water and milk. Make sure to bring plenty of water to events adding a sports drink (for electrolytes and carbohydrates), if needed and encourage sips during timeouts, breaks and halftime. For heavy sweaters, salt can be added to drinks or salty snacks can be incorporated into breaks and halftimes.

Visit our sports hydration page to learn more about nutrition and fueling the young athlete.